

Oracle Database 19c on Oracle Linux 7.9 in silent mode
To install Oracle Database 19c, the operating system must be prepared first. This example uses Oracle Linux 7.9; for more information, see the official Oracle link:
1) Preparing Oracle Linux 7.9 for Oracle Database 19c
Before starting the installation, the oracle-database-preinstall-19c package must be installed to automatically configure the operating system prerequisites. This package installs the required dependencies and creates the oracle user and the oinstall group.
Run the following command as ROOT:
$ yum install oracle-database-preinstall-19c.x86_64 -y2) How to unzip the Oracle Database 19c binaries
Once logged into the server as the oracle user, unzip the Oracle Database 19c installation binary inside the directory set in the $ORACLE_HOME variable, which is configured with the path: /u01/app/oracle/product/19.0.0/db_home1, as shown below:
## COM USUARIO ORACLE OU OWNER DO BANCO DE DADOS
### Configurar variáveis de ambiente
export ORACLE_BASE=/u01/app/oracle
export ORACLE_HOME=/u01/app/oracle/product/19.0.0/db_home1

### Mostrar conteúdo das variáveis
echo $ORACLE_HOME
echo $ORACLE_BASE

### Acessar e descompactar binários

cd /u01/binarios
unzip LINUX.X64_193000_db_home.zip -d $ORACLE_HOME

### acessar o diretório dos binários descompactados
cd $ORACLE_HOME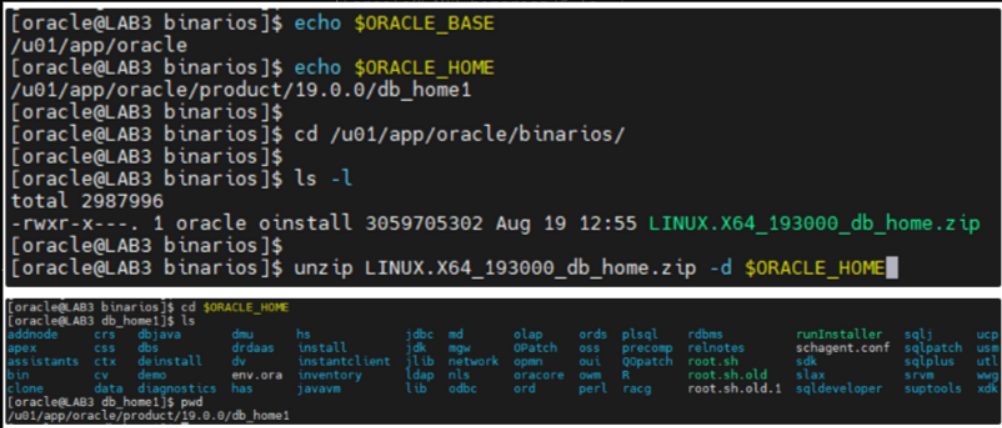
3) Creating the response file for the Oracle 19c silent install
Create a configuration file named db19_response.rsp. This file will be used as a parameter for installing the binaries. By default, a template file is available in $ORACLE_HOME/install/response/, but we will create our own, as shown below:
Remember it must be adjusted for each environment. In this case, an Enterprise Edition is being installed!
### criar arquivo de configuração
vi /u01/app/oracle/product/19.0.0/db_home1/install/response/db19_response.rsp

### Copiar as informações abaixo para o arquivo criado db19_response.rsp

oracle.install.responseFileVersion=/home/oracle/rspfmt_dbinstall_response_schema_v19.0.0
oracle.install.option=INSTALL_DB_SWONLY
UNIX_GROUP_NAME=oinstall
INVENTORY_LOCATION=/u01/app/oracle/oraInventory
SELECTED_LANGUAGES=en,en_GB
ORACLE_BASE=/u01/app/oracle
ORACLE_HOME=/u01/app/oracle/product/19.0.0/db_home1
oracle.install.db.InstallEdition=EE
oracle.install.db.OSDBA_GROUP=oinstall
oracle.install.db.OSBACKUPDBA_GROUP=oinstall
oracle.install.db.OSDGDBA_GROUP=oinstall
oracle.install.db.OSKMDBA_GROUP=oinstall
oracle.install.db.OSRACDBA_GROUP=oinstall
oracle.install.db.rootconfig.executeRootScript=false
oracle.install.db.rootconfig.configMethod=ROOT
4) Installing Oracle Database 19c in silent mode on Oracle Linux
Now we can start the Oracle Database 19c installation in silent mode.
Run the command below in the same session as oracle:
### Acessar diretório ORACLE_HOME

cd $ORACLE_HOME
### Executar instalação em Silent Mode

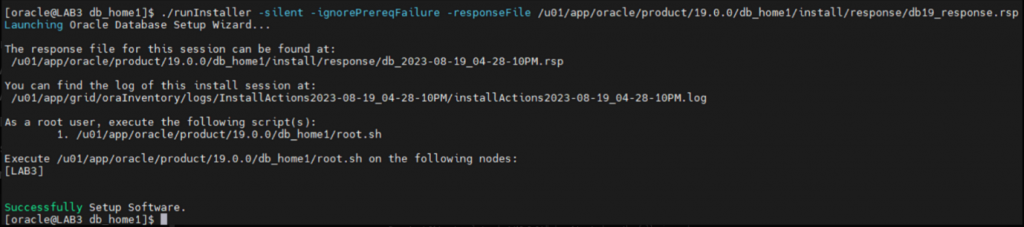
./runInstaller -silent -ignorePrereqFailure -responseFile /u01/app/oracle/product/19.0.0/db_home1/install/response/db19_response.rsp
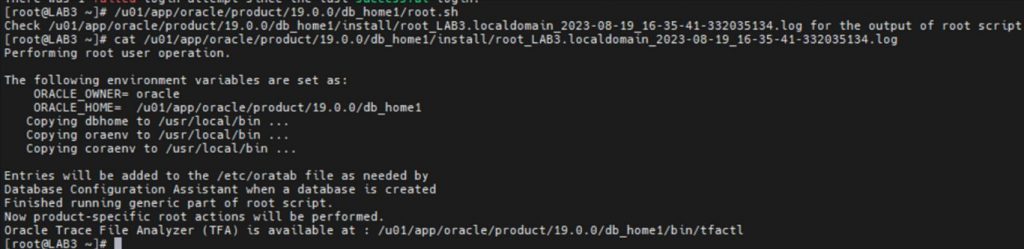
Once the installation finishes, you need to run the requested script as the ROOT user. To do that, open another SSH session and run the commands below:
In this session as the ROOT user, run the script on the operating system. You will need to press the ENTER key twice
5) How to validate the Oracle Database 19c installation
Validate the Oracle Database installation on the server by showing the contents of the OraInventory. This way you can confirm there is an Oracle Database installation on the server.
### Verificar instalações
cat /u01/app/oracle/oraInventory/ContentsXML/inventory.xml | grep -i OraDB19
Conclusion
By following these steps, you will have Oracle Database 19c installed on Oracle Linux 7.9 using silent mode. If you need to set up a database from this installation, you will have to run dbca or manually configure the initialization files.